| May 02, 2024 - 04:55 AM | |
 |
|||||||
|
|||||||
| The Amazon team is overpowered. | |||||||
|
|
|
|||||||||||||||||||||
|
Richy Undead Blog (updated 05/08/2008)
Introduction
The plan is to create an undead team with an Egyptian-theme using some of the great Egyptian-like models around at the moment. Once completed the team should have 14 players in total, plus a turn counter, re-roll counters and a display base. I thought about including some sideline staff but from previous experience I know that my enthusiasm will dry up well before I get these done so I'll stick to the basics.
These are the models I'll be using:
Mummies x2 ; Blood Bowl Khemri mummies (GW) Wights x2 ;WFB Tomb Kings tomb guard (GW) Ghouls x 4 ; Anubis blitzers and throwers (Impact) and ghoul (Crocodile Games) Skeletons x2 ; WFB Tomb Kings chariot crew* (GW) Zombies x4; Asar (human) warriors (Crocodile Games) + WFB zombie regiment bits (GW) * An idea cheerfully stolen from Mordredd's excellent Khemri team which I played against at the NAF WC. The general idea of the team is that the mummies, wights, ghouls and skeletons are all ancient - blood bowl players entombed thousands of years ago. The zombies on the other hand will be the newly dead - tomb robbers who chose the wrong tomb to rob. I'll thus be steering clear of green/grey skin, bulging eyes and rotting flesh in favour of a fresh-corpse look. The aim of the display base is to convey the theme of the team without becoming an overblown diorama affair or distracting from the team itself too much. The base will represent a newly opened Egyptian-style tomb (though not a pyramid) with the team arrayed on top near the entrance - a large stone slab levered up to reveal a vertical shaft. Grave robbing kit (rope, crow bars etc) will be littered around together with plunder from the tomb (retrieved prior to disturbing the occupants) - these bits and bobs will be the turn/re-roll counters. I'll probably also add a (properly) dead tomb robber near the entrance, damaged too badly to reanimate. I???ll try to produce updates as the team progresses covering both the assembly and painting of the models and the display base. 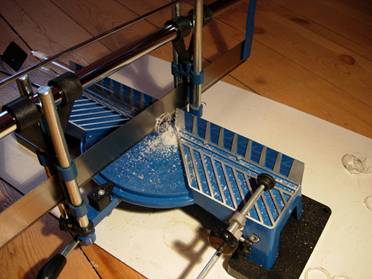 
Display base - initial assembly The base will be done to look as though it's built from massive stone blocks - I'm using rectangles of plasti-card of varying thickness, carved at the edges with a scalpel to give the impression of hand-hewn blocks. Since the bases of the players need to match the display base a bit of initial work is needed on the base. Trying to make the display base match the player???s bases after the players had been assembled and based would be too tricky. In order to get neat circular depressions for the players' bases to sit in I used sections from a plastic pipe with an internal diameter a little wider than a 25mm base. This was cut into 5mm slices using a mitre saw and glued to a piece of foam board. Two rectangles were also made using bits of thick plasti-card ??? these are where the reroll/turn counters (4 20mm square bases) will sit. 5mm is a little too deep really, but this thickness is needed since another layer of foam board will be going on top of the first, with holes cut out for the plastic rings. I may have to add a layer of thin card to the bottom of each hole to avoid the models sitting too low. Once all the rings were in place, corresponding holes were cut in another square of foam board and the two boards glued together. Once all this is put together it's time to start adding the plasti-card rectangles - I used three thicknesses; 0.75mm, 0.50mm and 0.25mm I think. The edges of each rectangle were carved away at with a scalpel and they were glued in place using PVA glue. Once dry, any rectangles overlapping the holes were trimmed to fit the edge of the hole, with the cut off piece retained for gluing to a 25mm base. 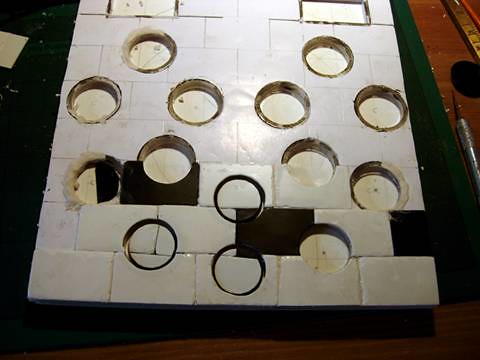 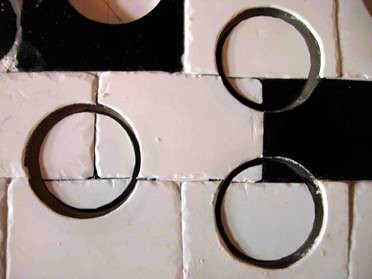 The 25mm bases get the off cuts of plasti-card glued to the top with polystyrene cement so that, with the bases sitting in the holes on the display base, the lines between the blocks match up. Predictably it didn't take me long to get bored of gluing rectangles of plasti-card to the display base and once I'd got a few 25mm bases ready I decided to start work on the team itself. 19th June 2008 Skeletons - assembly These are really quick to assemble, requiring virtually no conversion work. Once the bits had been snipped off the sprue and the mould lines filed down they were stuck together and glued to their bases with polystyrene cement (I use the liquid stuff which comes in a little bottle with a brush rather than the gloopy stuff in a tube). The only extra work needed was a simple weapon snip on one and a replacement hand on the other (from another skeleton sprue ??? easier than a weapon snip). Finally, I used a cheap rotary tool (like a Dremel, but not as good) with a small paring bit to create a depression in the top of a couple of the hands. 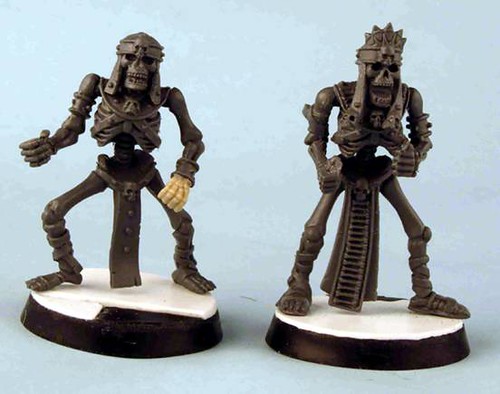 That???s it for these two ??? all they need now is some paint. Zombies - assembly The models I'm using for these (Asar warriors from Crocodile Games) were all carrying weapons with their arms in various positions. The idea was to remove the arms and replace them with GW plastic zombie arms. However, most of the models had their left arm across their chest to hold a shield which is a pain as it makes removing the arms more difficult. After taking this photo I decided I only needed four zombies for now, so no. 3 was put to one side. 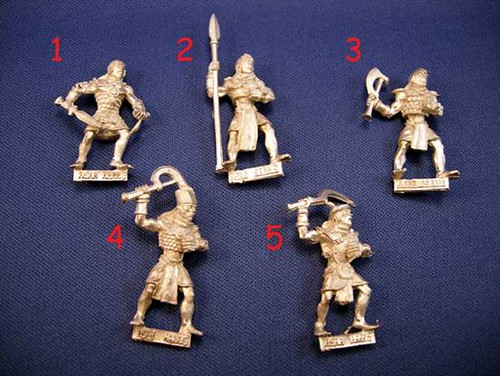
The other four models all had their arms removed with a razor saw and their base tags clipped off. All except no. 2 had their arms removed at the shoulder ??? no. 2 got to keep a little of his upper left arm. The places where the left arms met the torso were filed down flat to the body ??? nos. 2 and 5 cleaned up fairly nicely with just a file and rotary tool, but no. 4 needed some patching up. I decided to do a bit of extra work on no. 4 as I wasn???t keen on his pose. A horizontal cut was made across the stomach and the model bent forwards at the waist. Two more cuts were made ??? one under the chin and another behind the head, just under the brim of the hat, allowing the head to be tilted forward and bent to be facing forward. The gaps were patched up with a little putty (???Procreate??? ??? a lot like green stuff, but grey). I also hacked away at the model???s mouth a bit ??? he???ll have some damage there which will be sculpted later. With the arms off, all four models had holes drilled in the shoulders and plastic zombie arms pinned in place. On a couple I also added metal bits ??? a bracer from one of the arms that had been removed and a metal hand (from an Impact Anubis blitzer). The legs were then bent a bit to make the models look more awkward and shuffling. To attach the models to the bases, holes were drilled in the soles of the feet and metal pins (bits of paper clip) inserted, with corresponding holes drilled in the bases (which had wood filler added to the bottom to give me something to drill into). The models were then glued to the bases. 
They???re not quite finished yet ??? they???ll all be getting a bit of work with some putty to clean up the joins and add a few details, but they???re basically there. Well, that???s it for now ??? hope it was of use/interest. More to follow as the team progresses. 5th August 2008 Ghouls ??? assembly I???m using the excellent Anubis models from Impact miniatures for my ghouls. Not only are they great sculpts but they???re a good fit with ghouls conceptually. Anubis (a jackal- headed Egyptian deity) was the god of the dead and jackals were thought to haunt graveyards on the edge of the desert (hence the association with death). Whilst the Anubis models are great, there are only two of them; a blitzer and a thrower (although the blitzer has an alternative hand). For teams like this where I???m putting a lot of effort into conversions I prefer to avoid using duplicates of a model within the team if possible. I thus opted to use two unconverted Anubis models (one blitzer, one thrower) plus two converted models to add variety. 
The unconverted models required very little in the way of preparation. The only assembly required was gluing the blitzer???s hand in place (I used the spiked fist hand). Both models then had the base tab removed before being pinned to their bases. For the third ghoul I started with a blitzer model, using the alternative hand holding a ball. After a quick inspection I decided that I would have the model leaning forwards, putting some of its weight on the arm holding the ball, with the ball resting on the ground in front of it. Firstly I used a razor saw to make a cut between the model???s left arm and its left leg, which are joined at the wrist/forearm and thigh/knee). Once separated, I bent the arm forwards and upwards away from the leg, cutting a small notch in the front of the left shoulder to make the arm easier to bend. The saw marks on the model???s thigh were then filed down and the hand holding the ball pinned to the outstretched arm. This gave the basic stance for the model and a little bending of the legs/feet allowed the model to rest comfortably on its two feet and the ball held in it's hand. 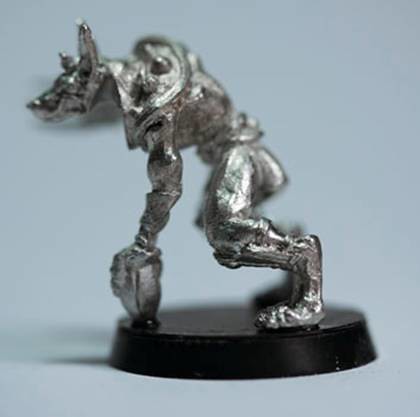
The model???s new pose left its head staring at the ground just in front of it. This was corrected by making a deep cut under the model???s chin with a razor saw and bending the head upwards to make it look forwards. I then removed the model???s right arm at the shoulder and cut off the hand, replacing it with a three-pronged punch dagger fist (from an assassin weapons sprue from Crocodile Games). The discarded fist, minus the fist spike, was re-used as a hand for zombie 5 (okay, so this blog isn???t in strict chronological order!). The arm was then pinned back in place at a different angle, with the fist held out to the side at head level. Finally, modelling putty was used to clean up the joins and repair lost detail. The place requiring the most attention was the neck where the cut under the chin had damaged the two bits of the model???s headdress which hang down on each side of it's head. Firstly I used putty to rebuild the model???s neck and the rear of its chin. Once this was fully hardened I then sculpted some new headdress bits, making sure that they hung vertically (relative to the model???s new stance). The other main places needing work were the back of the left wrist and the right shoulder. 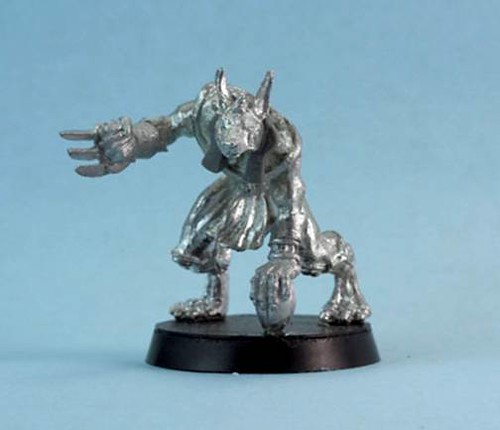
For the fourth ghoul I had another Anubis thrower model, but was a bit stumped about how to go about converting it. The sculpt is excellent, but the position of the arms close to the body make conversion tricky ??? I???d either end up with a model very similar to the original or I???d need to butcher the model so badly that I???d be forced to extensively re-sculpt it (and my sculpting skills aren???t really up to matching the style of the original). I thus decided to look for another model with a similar body shape to the Anubis models which I could do a head-swap on (using the head from the Anubis thrower). I knew that this would probably mean sculpting a fair bit of clothing/armour, but this is a lot easier to sculpt than musculature. A little browsing later and I found the ghouls from Crocodile Games??? War Gods of Aegyptus range. Heads aside, these models are a good match for the Anubis models and they???re naked, making adding clothing easier. There were six poses to choose from and I opted for Ghoul E (???growling???). 
After removing the mould lines from the ghoul model I filed away the various spots and pustules on the model (as the Anubis models don???t have these). I then removed the model???s head at the shoulders using a razor saw and filed the neck/shoulders flat, then loosely pinned the head from the Anubis thrower model in place (without glue), leaving a neck-sized gap of wire between head and shoulders. My sawing had (purposively) removed the necks from both models, so I needed to avoid gluing the head directly to the ghoul body, as this would give a neck-less model. I made a spacer to go between the head and the shoulders of the ghoul body using a bit of plastic rod (the shaft of a discarded skeleton weapon) with a hole drilled down the middle. A small section of this was slotted over the wire projecting from the shoulders of the ghoul body and the head was then loosely pinned in place (without glue) on top. A little playing around and I found a neck length that looked good, cutting the spacer rod to the correct length and gluing it in place. The head wasn???t glued on at this stage, to avoid interfering with the sculpting to come. Finally, I drilled two holes in the ghoul body roughly where the genitals and anus would be (oo-er) and glued a loop of wire (paper clip) between the two ??? this will provide a frame work to build the loin cloth around. 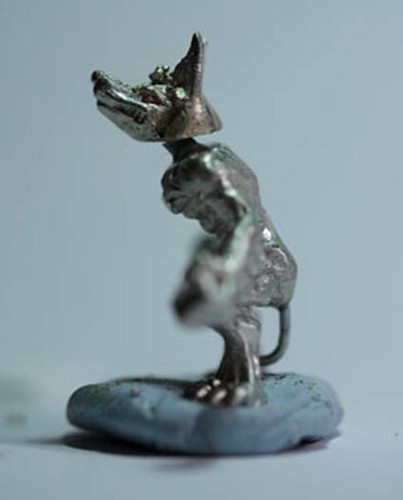
Next came the sculpting work. Firstly I mixed up some putty and rolled it out to a thickness of a millimetre or a little less. Once this had cured a little I cut a circle from it of the same diameter as the shoulder protection on the Anubis models (about 11mm). I then cut a rough hole in the middle of this circle and draped the circle over the shoulders of the ghoul body, with the neck wire going through the hole in the centre of the circle. The circle went a bit wonky at the edges when it was put in place but I didn???t let this worry me too much. Before the circle had set I used a scalpel to score a number of lines in the circle, radiating out from the centre (just like the Anubis thrower has). Off cuts of putty from the circle were roughly moulded around the loin-wire to provide a base for the loin cloth. Once the circle had set I neatened up the edges with a sharp scalpel, undercutting the edge slightly to give a more 3D look. More putty was used to add a border around the edge of the circle ??? this was put roughly in place as a long sausage of putty and flattened, teased and coerced into place with a scalpel. Again final neatening was done with a scalpel once the putty had fully cured. The next stage was to build up the back of the headdress, using a sculpting tool to blend the putty in with the existing metal. Once this was cured the two bits of headdress hanging down on either side of the model???s face were sculpted. For the loin cloth, once I???d got a reasonable sized blob of putty in place around the loin-wire I started work on the loin cloth itself. I rolled out some putty fairly thinly and once this had cured slightly, cut two loin cloth sized rectangles. Once these had been allowed to cure a little longer (about 15mins) they were folded up slightly by pushing gently from opposing sides and fixed in place on the model, one at the front and one at the back. Once these had cured extra putty was added to smooth the line between the thin loin cloth bits of putty at front and back and the big lump of putty between them. A belt was also added (putty rolled flat, cut into a long strip and placed around the model???s waist), with buckle and rivet details added after this had cured. Finally I added a couple of bracelets around the model???s wrists. 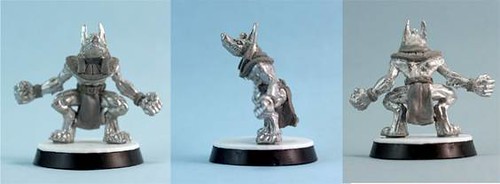
Richy
3030 total words in this text
|
3867 reads
|
|


